Crash course on off-grid WOUND CARE
08/29/2025 / By Lance D Johnson
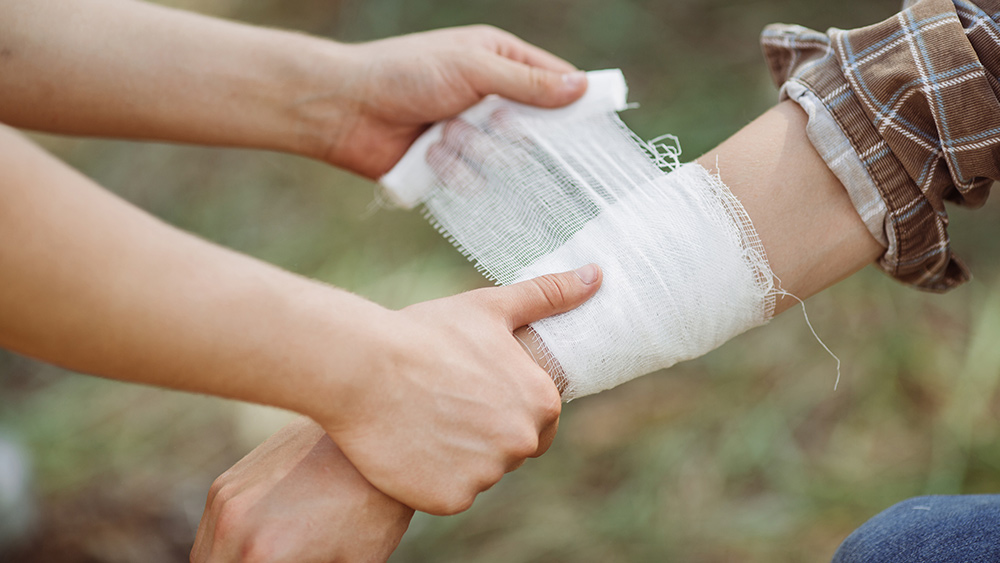
If your were miles from the nearest hospital, deep in the backcountry, and you were accidentally wounded, what would you do? What would you do when a hunting knife slips into your leg, or your friend accidentally gashes their arm? Blood is pooling fast, panic is rising faster, and every pair of eyes locks onto you like you’re the last lifeline in a storm.
For most of us, the idea of stitching up a wound without a doctor present sounds like something out of a war movie — something only a battlefield medic or a rugged frontier surgeon should attempt. But history tells a different story. Before ambulances had sirens and hospitals dotted every county, people had to know how to close wounds, stop bleeding, and prevent infection. And today, in a world where medical help isn’t always a 911 call away — whether you’re off-grid, in a disaster zone, or facing a collapse scenario — those skills aren’t just useful. They’re essential. So let’s break it down — step by step, myth from fact, panic from purpose — because when the moment comes, hesitation isn’t a luxury you can afford. Here’s a crash course on off-grid wound care.
Key points:
- Bleeding is enemy number one — stop it fast with direct pressure, tourniquets as a last resort, and hemostatic agents if available.
- A dirty wound is a deadly wound — clean it like your life depends on it (because it might).
- Not every wound needs stitches — butterfly bandages and sterile strips can save the day (and the skin).
- Suturing is a skill, not a mystery — with sterile tools, the right knot, and steady hands, even a novice can close a wound.
- Infection is the silent killer — watch for redness, heat, pus, and foul smells, and act fast if they appear.
- Nature’s first aid kit beats nothing at all — honey, alcohol (for cleaning, not drinking), and boiled water have saved lives for centuries.
- Legal protections exist, but so do limits — Good Samaritan laws cover well-meaning helpers, but don’t play hero beyond your training.
First things first: The bleeding has to stop
Blood is dramatic. It’s messy, it’s terrifying, and if it’s pumping out of someone like a fountain, your window to act is small. The human body holds about 1.2 to 1.5 gallons of blood. Lose a third of that, and the body starts shutting down. Lose half? It’s often fatal. So before you worry about stitches, sterilization, or anything else, the bleeding stops. Period.
Direct pressure is your best friend. Grab the cleanest cloth you have — sterile gauze if you’re lucky, a bandana if you’re not — and press it hard against the wound. Don’t peek. Don’t lift it to check. Just press. If blood soaks through, add another layer on top and keep pressing. Most bleeding will slow or stop within a few minutes.
But what if it doesn’t? That’s when you escalate. Hemostatic gauze, impregnated with clotting agents like chitosan or zeolite, can be a game-changer. Pack it into the wound and hold pressure. No hemostatic gauze? A tampon works in a pinch. It’s designed to absorb blood and can be pressed into a deep wound.
If the bleeding is from an artery — bright red, spurting with each heartbeat — you’re in critical territory. Tourniquets save limbs (and lives) but at a cost. Apply it above the wound (between the injury and the heart), tighten until the bleeding stops, and write the time on the patient’s skin. Tourniquets cut off circulation, and after about two hours, tissue starts dying. If you can’t get to a hospital, you’ll have to loosen it periodically to restore blood flow, but that risks restarting the bleeding. It’s a brutal trade-off, but it beats bleeding out.
Cauterization is the nuclear option. Heating a metal object (a knife, a spoon, even a heated rock) and pressing it to a bleeding vessel can seal it shut. It’s agonizing, it smells like burning flesh, and it leaves a nasty scar — but if it’s the only way to stop a life-threatening bleed, it’s been done for centuries. (The ancient Greeks used red-hot irons. You work with what you’ve got.)
Clean it like you mean it: The battle against infection
Once the bleeding is under control, the real work begins: preventing infection. In a sterile hospital, surgeons have autoclaves, antibiotic flushing solutions, and teams of nurses to keep everything pristine. You? You’ve got boiled water, soap, and maybe some iodine if you’re prepared.
Step one: Wash your hands. Sounds obvious, but in the heat of the moment, it’s easy to forget. Scrub with soap and boiled water (or alcohol-based sanitizer if that’s all you have). Your hands are the biggest threat to the wound right now.
Step two: Irrigate the wound. If you’ve got sterile saline, great. If not, boiled and cooled water is your next best bet. Use a syringe (or a plastic bag with tiny holes poked in it) to flush out dirt, debris, and bacteria. Never use straight alcohol, hydrogen peroxide, or iodine inside the wound — they kill tissue and slow healing. (A diluted iodine solution—1 part iodine to 10 parts water — can help, but neat iodine is for outside the wound only.)
Step three: Debride if necessary. Dead tissue is a buffet for bacteria. If the wound has ragged edges or grayish, mushy flesh, you’ll need to trim it away with sterile scissors or a scalpel. This isn’t for the squeamish, but leaving necrotic tissue behind is asking for gangrene.
Step four: Decide — close it or leave it open? Not every wound should be stitched shut. Animal bites, puncture wounds, and anything older than 12 hours are better left open to drain. Stitching them traps bacteria inside, turning the wound into a pressure cooker for infection. But a clean, fresh cut that gapes open? That’s a candidate for closure.
Thread, needle, and nerve: The art of suturing
Suturing is where most people freeze. The idea of pushing a needle through someone’s skin — intentionally — feels like crossing into mad scientist territory. But here’s the truth: Suturing is just sewing. If you’ve ever mended a torn jacket or stitched a stuffed animal back together, you already understand the basics.
What you’ll need:
- A sterile needle (or a regular sewing needle, boiled for 20 minutes).
- Suture thread (or thin nylon fishing line, also sterilized).
- Needle drivers (or needle-nose pliers, sterilized).
- Sterile gloves (if you have them).
- Benzoin tincture (to help adhesive strips stick better).
- Antiseptic solution (diluted iodine or alcohol for the surrounding skin).
The process:
- Numb the area if you can. If you’ve got lidocaine or even ice, use it. If not, warn the patient — this is going to hurt.
- Start in the middle. Place your first stitch at the deepest part of the wound, where the edges meet. This anchors everything.
- Use a surgeon’s knot. It’s just a square knot with an extra twist on the first loop to keep it from slipping. (YouTube has tutorials — watch them now, not in the moment.)
- Space stitches evenly. About 1/4 to 1/2 inch apart, depending on the wound. Too far, and the wound won’t close properly. Too close, and you’ll strangle the tissue.
- Tie them snug, not tight. You want the edges to touch, not turn white from lack of blood flow.
- If you’re nervous, practice on a pig’s foot or a piece of leather first. The texture is surprisingly similar to human skin.
Alternatives to sutures:
- Butterfly bandages or sterile strips can close smaller wounds without threading a needle.
- Surgical staples (if you have a sterile stapler) are faster and easier than stitches.
- Super glue (cyanoacrylate) works in a pinch for small, clean cuts—but never use it on a dirty or deep wound.
The waiting game: Monitoring for infection
You’ve stopped the bleeding. You’ve cleaned the wound. You’ve closed it up. Now comes the hard part: waiting to see if it all works.
Signs of infection (act fast if you see these):
- Redness, swelling, heat around the wound.
- Pus (yellow, green, or foul-smelling drainage).
- Red streaks moving away from the wound (lymphangitis—a sign the infection is spreading).
- Fever or swollen lymph nodes.
If infection sets in:
- Hot compresses (20 minutes, 4 times a day) can draw out infection.
- Elevate the wound above the heart to reduce swelling.
- Antibiotics (if available) — penicillin, amoxicillin, or doxycycline can fight bacterial infections.
- Reopen and clean if pus is trapped inside. Sometimes you have to undo your stitches to let the wound drain.
Gangrene is the nightmare scenario. If the skin turns black, the wound smells rotten, or you see bubbles in the tissue, you’re dealing with dead flesh. At this point, amputation might be the only way to save the patient’s life. If you’re in a survival scenario, this is where having a casualty evacuation plan (and a very sharp, sterile knife) becomes critical.
The hard truths no one talks about
Let’s be real: This isn’t pretty work. There’s a reason surgeons train for years. But in an austere setting — whether it’s a collapsed society, a remote wilderness, or a disaster zone where hospitals are overwhelmed — you might be the only help available. And that means making hard calls.
- Pain is part of the process. You’re causing short-term agony to prevent long-term suffering. Warn the patient, apologize, and move fast.
- You will make mistakes. Maybe a stitch tears through. Maybe the wound gets infected anyway. Learn from it.
- Legal protections exist, but they’re not ironclad. Good Samaritan laws generally protect you if you act in good faith and within your training. But if you start performing surgery you saw in a YouTube video, you’re on shaky ground.
- Some wounds can’t be fixed in the field. If someone’s intestines are spilling out, or an artery is severed beyond repair, your job is damage control—keep them alive until you can get them to real medical care.
You don’t have to be a doctor to save a life. You just have to be prepared, practiced, and willing to act when others freeze.
Start small:
- Take a first aid class. (The Red Cross and local community colleges offer them.)
- Build a trauma kit. (Include sterile gloves, gauze, hemostatic agents, suture materials, and antibiotics.)
- Practice on fake wounds. (Use leather, fruit, or a first-aid dummy.)
- Learn the signs of shock, infection, and internal bleeding. (Knowledge is your best tool.)
Because when the moment comes — and if you’re reading this, there’s a chance it will — you won’t rise to the occasion. You’ll default to your level of training. So train. Prepare. And when the blood starts flowing and the panic sets in, be the one who steps forward and says, “I’ve got this.”
Sources include:
Submit a correction >>
Tagged Under:
austere medicine, bleeding control, DIY stitches, emergency medicine, first aid, hemostatic agents, homesteading health, infection prevention, medical preparedness, natural antiseptics, off-grid health, post-collapse medicine, survival skills, survival surgery, suturing guide, tourniquet use, trauma response, wilderness first aid, wound care, wound irrigation
This article may contain statements that reflect the opinion of the author


